Each site has its own identity, other than the website’s logo and the organized content, it is the website title and the favicon that differentiates a site from others.
We all are familiar with setting the favicon aka. site icon in a WordPress website when it comes to lower WP versions. However, with the introduction of WordPress 5.9 and the invent of full site editing site editing now has a different ‘block-based’ approach.
Site customization now is not that simple as the Customization menu that previously was in the Appearance section has been broken down and segregated deep inside the ‘Editor’ menu.
However, we’re here to help you, in this article we’ve explained how you can set a favicon or site icon using a WordPress block theme. We’re using our very own Gutena for this task, however, if you are on a different theme, the steps still remain the same for all block-based themes.
What are Site Icons and Why are they Important?
Consider this scenario: You open your bookmark menu and see a list of text links without pictures. How do you know which link is which? That’s when the favicon comes to the rescue, adding a visual element to your links.
A favicon (short for favorite icon), also known as a shortcut icon, website icon, tab icon, URL icon, or bookmark icon, is a small icon file associated with a specific website or web page.
Following are some of the benefits of Favicons:
- Enhances usability of any web interface
- Promotes Brand Awareness & recognizability
- Easy to find & navigate through a lot of pages
Site Icons in WordPress are what you see in browser tabs, bookmark bars, and WordPress mobile apps. WordPress recommends that site icons be square and at least 512×512 pixels in size.
Steps to add Favicons in WordPress Block Theme
If you’re added the site logo at the time of installing WordPress you probably already have a site icon that is the same as your logo. Follow the below-mentioned steps to set a new site icon.
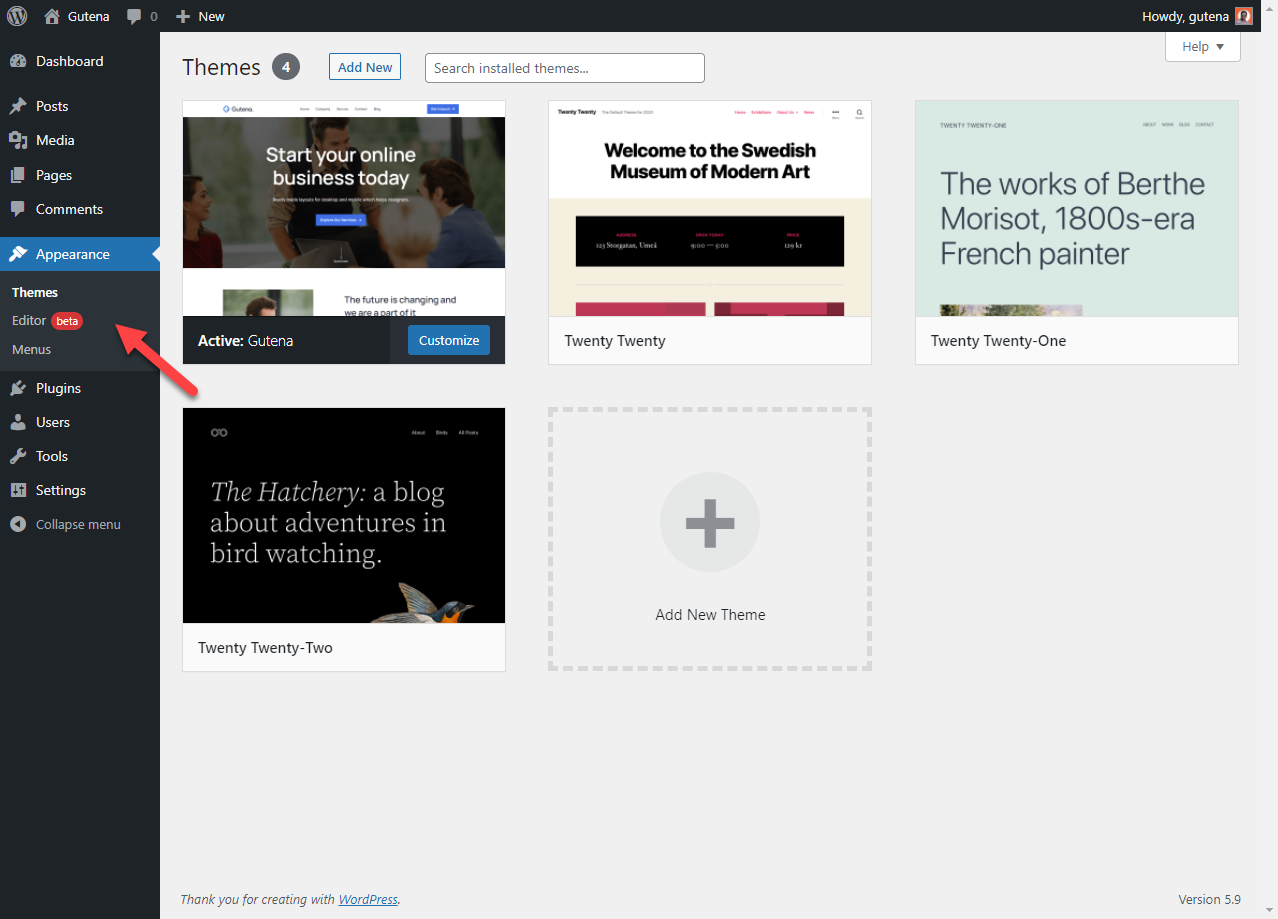
Step 1: From your WordPress admin panel navigate to Appearance > Editor
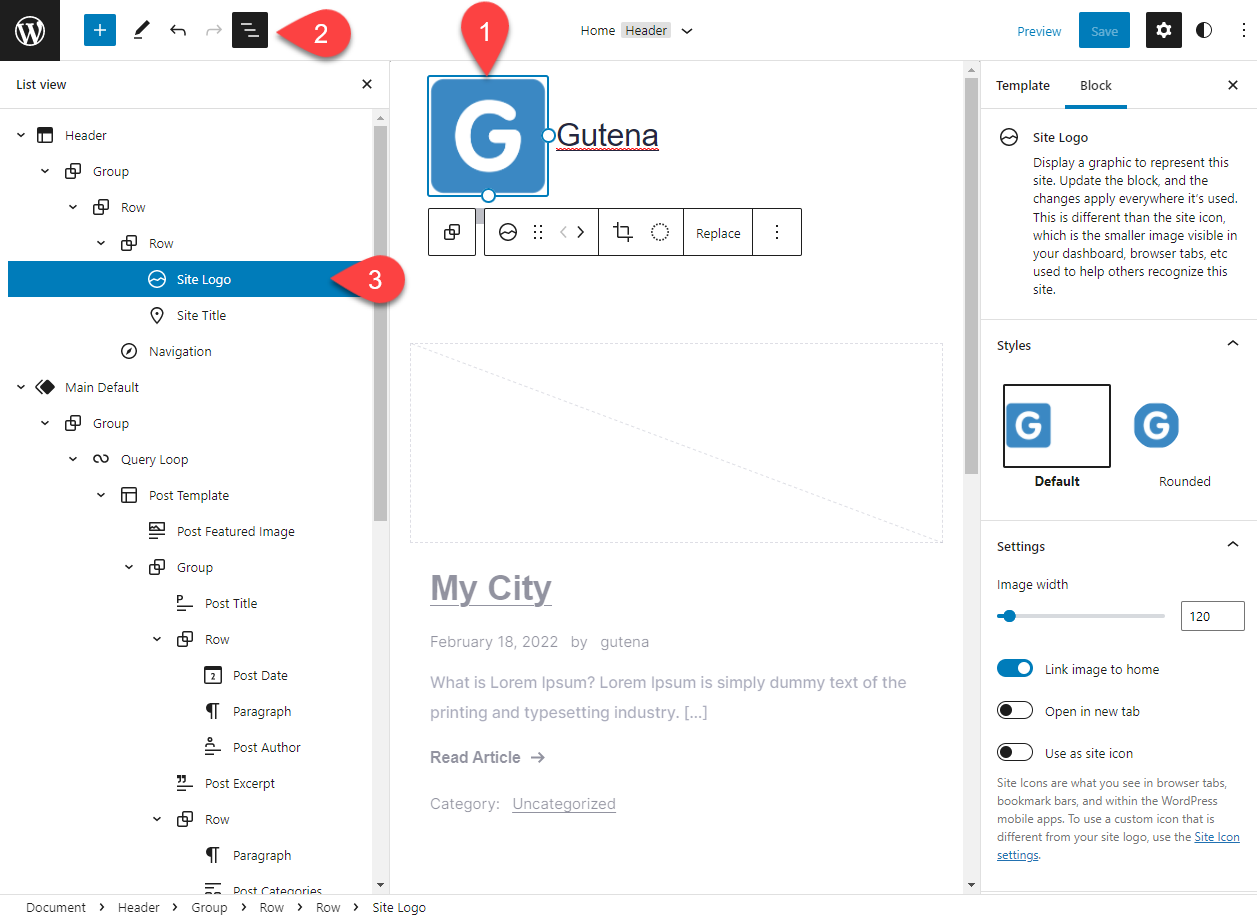
Step 2: Click on the site logo and then on the list view icon at the top. Then look out for the “Site Logo” and click on it.
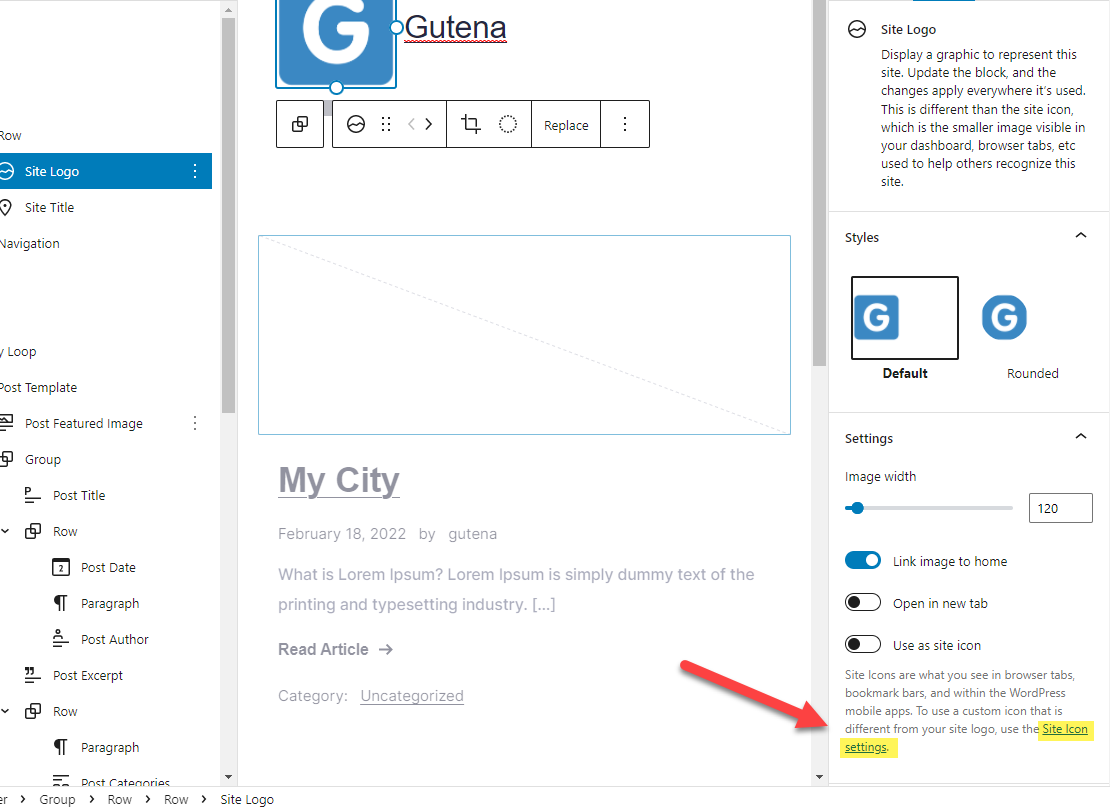
Step 3: Block Setting opens up, and find the “use as site icon”. If you want to set your current site logo as a site icon then you can enable this feature else if you want to set a different icon as a favicon click on the link that says “Site Icon settings“.
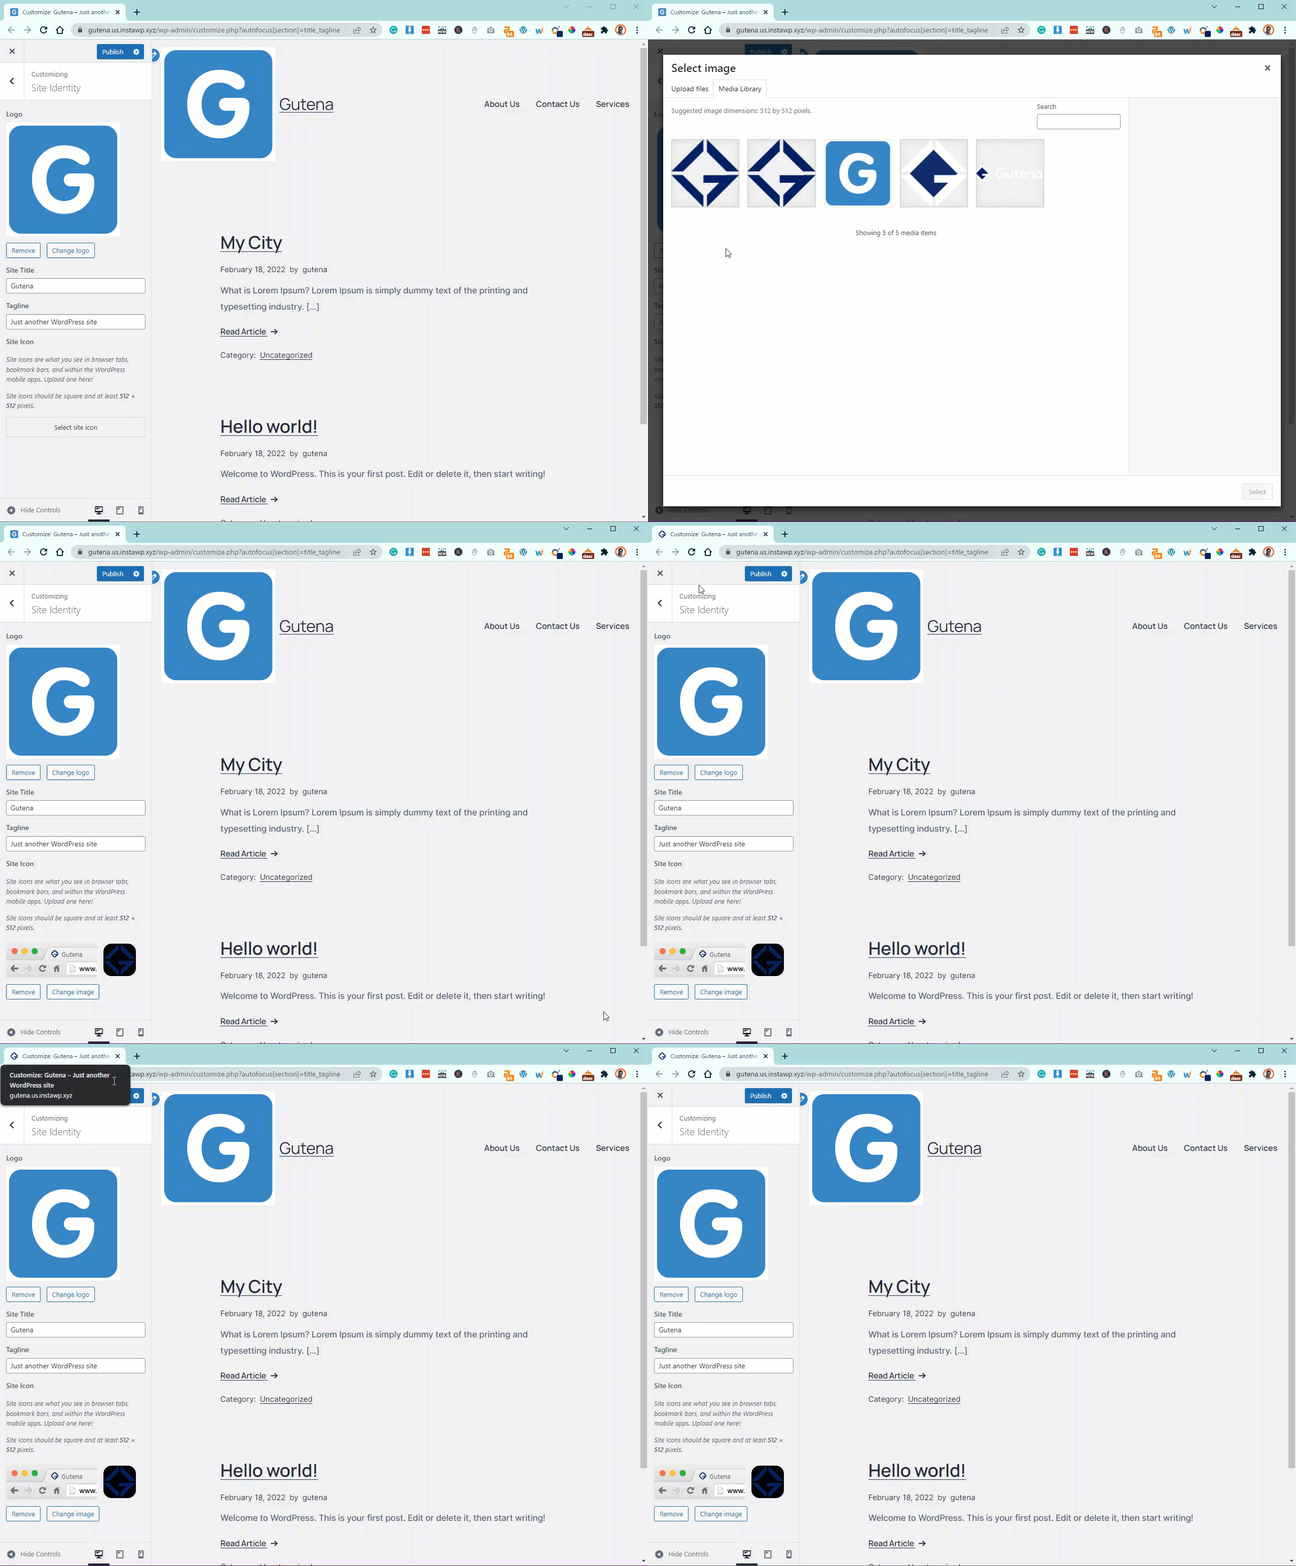
Step 4: A new browser tab opens up with the customization options, in the Site Icon option click on the “Change Image” Button if you already have an existing site icon or click on the “Select site icon” to add a new one.
Conclusion
This is how you add a site icon in the WordPress block theme. If you want to learn more about tweaks and features of WordPress block themes to stay connected, we regularly post such useful articles.
Thinking of creating a sidebar with a block theme? We already have a tutorial for that.
For the sake of this demonstration, we’ve created a WordPress instance using the WordPress Sandbox service from InstaWP.
